In Good Shape - Optimizing Distortion in a Cast Iron Housing
The company Eisenwerk Martinlamitz (EWM) is specialized in the production of complex ductile and gray cast iron parts. As a systems supplier, ensuring a reliable customer supply through robust processes is key to the long-term success of the company. This is consistently achieved, also considering the environmental requirements as well as the economical use of energy and resources. For quality assurance, in addition to conventional material and crack tests, the company also continuously checks the dimensional accuracy of their castings in-house using a 3D laser scanner.
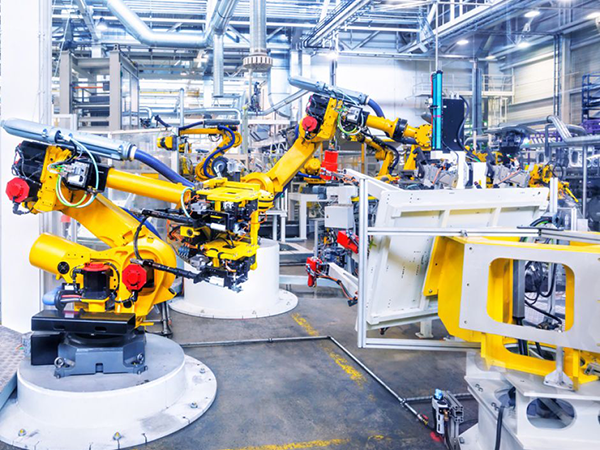
Martinlamitz produces, among others, components for use in modern industrial robots, for example for welding and painting processes. These applications are turning into an important market for castings. Globally, over 1.7 million new industrial robots are expected to be installed by 2020, their total number thus rising to over 3 million.
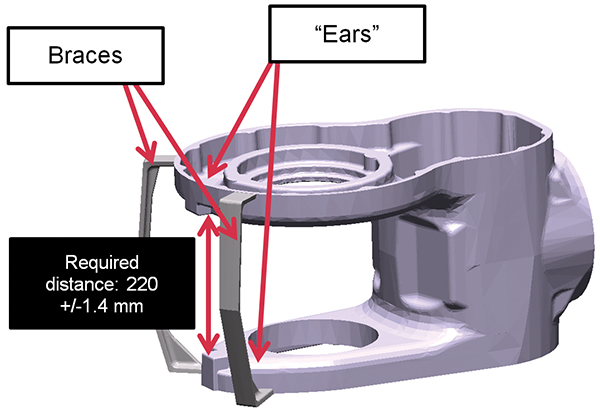
The demand for maximum precision in use, of course, means correspondingly high requirements for dimensional accuracy and tolerances of the castings assembled in industrial robots. For the chosen part cast in GJS 500 ductile iron, the tolerance is 220 mm +/-1.4 mm. This applies for the finished part after the gate and riser are removed and a corresponding machining step for cutting off the braces.
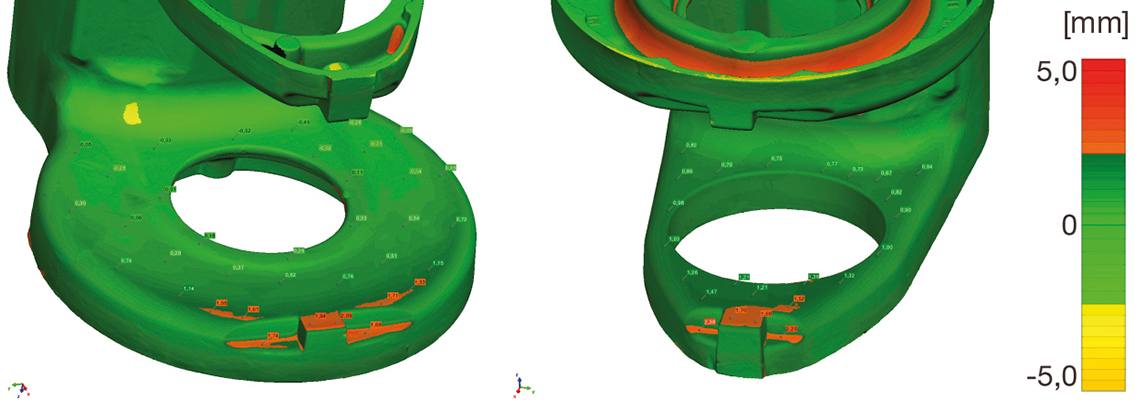
At the beginning of production, it was not possible to meet this tolerance due to casting distortion. Without changes, this situation would have required expensive and extensive machining through surface grinding of the two areas called “ears”. In Figures 3 (left/right) or below, you can see the results of the measurements compared to the specified dimensions, where the orange colors show a deviation of more than 1.5 mm.
For many years, Martinlamitz has successfully used MAGMASOFT® for designing and optimizing their casting designs. With the introduction of Autonomous Engineering, Martinlamitz uses these new capabilities wherever possible. Therefore, the previously calculated mold filling, solidification and cooling to shake-out of the casting were used to identify and investigate the residual stresses and the distortion of the casting based on the corresponding temperature fields.
For the calculation of stresses and distortion of the housing, in addition to the casting and the rigging, the influence of the constrained casting shrinkage caused by the internal core was also considered. In this context, the contact forces and the wall friction between the sand core and the casting were also determined. To describe the thermomechanical material behavior of GJS 500 ductile iron, the material data available in MAGMASOFT® and the strain rate-dependent creep model were used.
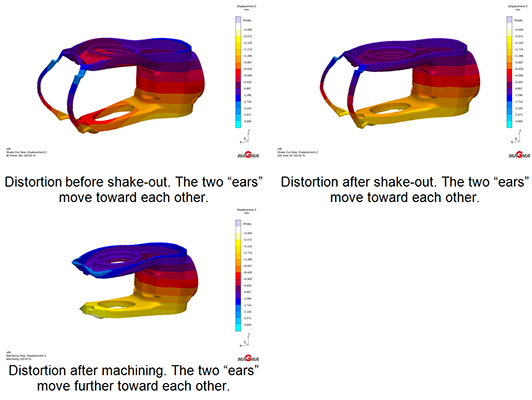
Already the first simulation revealed that the residual stresses arising during cooling in the mold are primarily formed due to the casting shrinking onto the sand core. After shake-out, a part of the residual stresses persists which lead to a deformation of the casting. Cutting off the braces results in the release of more residual stresses, thus leading to even more deformation in the casting. As a result, the two “ear” areas keep moving towards each other, leading to a significantly distorted casting. As a consequence, the required dimensional tolerance between both “ears” cannot be kept (Figure 4/ bottom image).
After analyzing the causes for the distortion, various possible corrective measures were discussed in the foundry. The experts at Martinlamitz opted for corrective action already in the casting process, by modifying the pattern plate to compensate for the distortion. Compared to the originally cast variant, the modified pattern considered an additional corresponding tolerance of 2.5 mm. The analysis with MAGMASOFT® showed that this measure produced a casting whose dimensional accuracy corresponded to the required specifications. The implementation on the shop floor confirmed that the foundry was able to reliably reproduce the required tolerances without expensive and extensive machining.
Eisenwerk Martinlamitz
Eisenwerk Martinlamitz, a company whose tradition as a hammer mill dates back to the 13th century is based in Germany. Today, they are a successful German systems supplier for ductile and gray cast iron parts. Their castings are offered as unfinished or machined parts as well as assemblies, weighing from 20 to 350 kg.


